
 EN



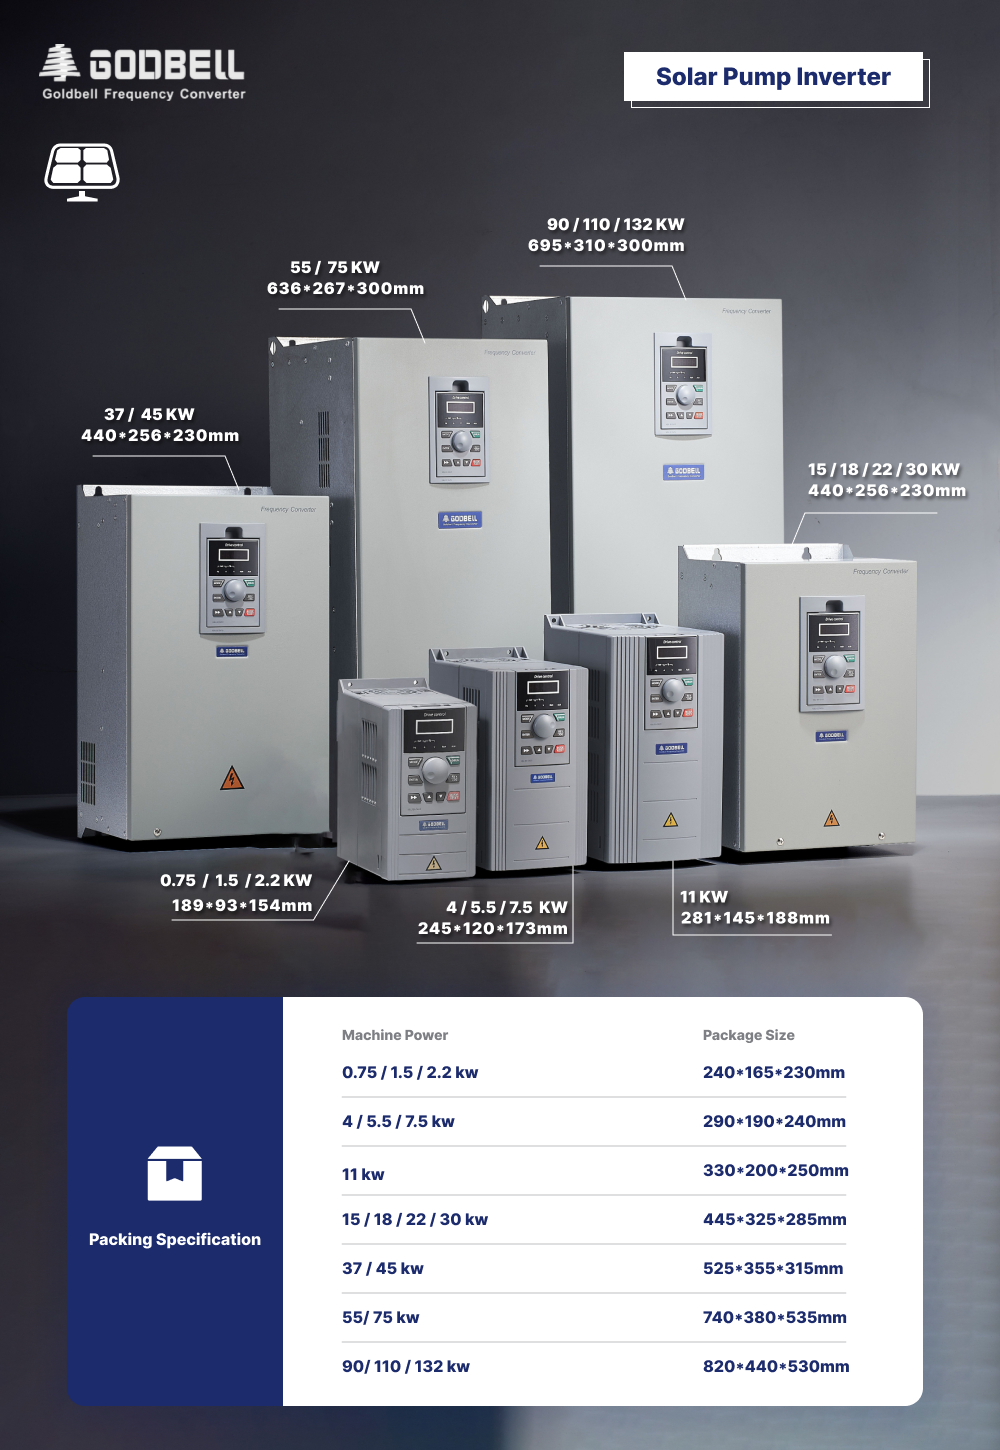
Why Choose a Solar Pump Inverter for Irrigation?
A solar pump inverter converts the direct current (DC) output from photovoltaic panels into alternating current (AC) to power irrigation pumps—freeing farms from volatile diesel or grid electricity costs. By replacing fossil fuels with solar energy, these systems eliminate fuel expenses and can cut operational costs by up to 80% (IRENA 2022). Advanced maximum power point tracking (MPPT) maintains peak efficiency even under variable cloud cover, dynamically matching water output to crop demand. Unlike conventional setups, the inverter automatically adjusts motor speed to prevent over-pumping and conserve groundwater—enhancing long-term water stewardship. With no ongoing fuel bills and minimal maintenance, many users achieve full return on investment within two to three growing seasons. For remote, off-grid locations, reliability translates directly into consistent irrigation, higher yields, and measurable climate impact: a single unit can offset several metric tons of CO₂ annually.
Pre-Installation Planning for Your Solar Pump Inverter
Site Assessment: Sun Exposure, Water Source Depth, and Load Profile
A rigorous site evaluation ensures year-round reliability. Begin by quantifying daily solar irradiance—especially during dry-season peaks—and map shading from trees, structures, or terrain across the planned PV array. Per FAO (2023), oversizing the array by 20% compensates for low-light conditions and early-morning inefficiencies, sustaining steady pumping. Accurately measure water source depth and static water level to determine required pump head and select between submersible or surface pump configurations. Finally, develop a load profile capturing daily water volume needs, peak demand windows, and storage tank presence. Aligning the inverter’s output curve with this hydraulic profile prevents disruptive start-stop cycling—reducing mechanical stress on both motor and electronics.
Component Compatibility: Matching the Solar Pump Inverter with PV Array and Pump
Mismatched components compromise efficiency and longevity. Confirm the pump’s voltage, phase (single or three-phase), and full-load amperage—including inrush current capacity—so the inverter avoids nuisance tripping. The PV array’s maximum power point voltage and current must fall squarely within the inverter’s DC input specifications; series-parallel string design must respect voltage limits. Cable sizing is non-negotiable: undersized conductors increase voltage drop, degrading MPPT responsiveness—aim for ≤3% loss using manufacturer-recommended cross-sections. For submersible or centrifugal pumps, verify the inverter supports frequency-sweep soft starting. Field data from a 2022 installation survey shows properly matched PV–inverter–pump systems achieve up to 95% energy conversion efficiency, while mismatched configurations often fall below 70%.
Step-by-Step Solar Pump Inverter Installation
Installing a solar pump inverter correctly ensures safety, durability, and optimal performance. The process integrates mechanical mounting, electrical integration, and system commissioning—each phase requiring precision and adherence to best practices.
Mounting, Grounding, and Environmental Protection
Mount the inverter vertically on a stable, vibration-free surface using the supplied bracket—shielded from direct sunlight, rain, dust, and excessive heat, yet allowing unobstructed airflow. Maintain at least 300 mm clearance from walls or adjacent equipment to support natural convection cooling. Ambient temperatures above 40°C can reduce inverter efficiency by up to 10% (2023), so avoid enclosed or poorly ventilated enclosures. Ground the unit robustly: connect its earthing terminal to a dedicated ground rod or the site’s earth grid using a minimum 6 mm² copper conductor, keeping the path short and straight to ensure low-impedance fault protection. Tighten all fasteners to specified torque, install weather shields if the enclosure lacks IP65/IP66 rating, and add anti-tamper covers or padlocks where physical security is needed.
DC Wiring from PV Array and AC/Variable-Frequency Connections to Pump
Route PV DC cables to the inverter’s solar input terminals with strict polarity adherence—reverse connection risks immediate internal failure. Use PV1-F or equivalent solar-rated cable sized to limit voltage drop to <2%, referencing manufacturer tables based on array short-circuit current. Secure entries via cable glands to preserve the enclosure’s IP rating. Connect pump motor leads to the inverter’s output terminals per phase markings and the pump’s wiring diagram. For three-phase or variable-frequency drives, keep motor cable length within the inverter’s specified limit—typically 50 meters—to suppress reflected-wave voltage spikes. Verify all terminal torques meet specifications. Install a DC isolator switch near the array and an AC disconnect between inverter and pump to comply with local isolation requirements and enable safe maintenance.
Commissioning, Safety Checks, and Compliance for Solar Pump Inverters
Electrical Isolation, IP Rating Verification, and Arc Flash Prevention
Before energization, confirm all lockout/tagout (LOTO) points on DC and AC disconnects are clearly labeled and fully functional. Validate the inverter’s IP rating—IP65 or higher is essential for dust- and water-resistance in agricultural settings. Conduct an arc flash assessment per NFPA 70E: establish PPE boundaries, inspect internal arc barriers, and ensure compliance with site-specific electrical safety protocols. A 2023 NFPA report identifies inadequate arc flash controls as a contributing factor in nearly 6% of solar-related electrical injuries. Supplement with insulation-resistance testing and documented verification that all energy sources can be isolated—this reduces shock risk by over 80% (IEEE 2021).
Performance Validation: Flow Rate, Voltage Stability, and MPPT Efficiency
Once powered, validate real-world performance against design targets. Measure actual flow rate under varying irradiance levels and compare it to the calibrated pump curve—acceptable deviation is ±10%. Record DC input voltage directly at the inverter terminals under load to identify wiring losses or PV-inverter mismatch. Confirm MPPT efficiency remains ≥99% (modern controllers routinely achieve 99.5% accuracy, per Fraunhofer ISE 2022). Monitor AC or variable-frequency output waveforms for stability and minimal voltage ripple—clean power delivery extends pump life and ensures irrigation targets remain consistently met. Document all readings for baseline reference and future diagnostics.
FAQ
What is a solar pump inverter and how does it work?
A solar pump inverter converts the DC power from solar panels into AC power to run irrigation pumps. It optimizes energy usage by adjusting motor speed and preventing over-pumping.
Can I use a solar pump inverter for different types of pumps?
Yes, a solar pump inverter can be configured for submersible, centrifugal, or surface pumps, provided the voltage, phase, and power requirements are compatible.
How do I ensure my solar pump inverter operates efficiently?
Efficient operation depends on component compatibility, correct installation, proper wiring, and performance validation to ensure optimal MPPT efficiency and voltage stability.
Are solar pump inverters environmentally friendly?
Yes, they eliminate the need for fossil fuels, reduce CO₂ emissions, and conserve groundwater resources, making them highly eco-friendly.
What kind of maintenance does a solar pump inverter system require?
Solar pump inverters require minimal maintenance—occasional cleaning of solar panels, ensuring proper grounding, and periodic checks for optimal performance.